Language Translator
1 Introduction
In this article, I explain how a compiler works, from processing the source file to translating it into object code. This post is based on a university project for the course Language Translators. All source code is available in my GitHub repository (link at the end, in the Tools section).
The translator takes a source file written in the Boreal Language, previously validated by the processor, and generates an .ens file with the object code of the program, written in the ENS2001 Language.
The project is divided into two main parts:
- Language processor, written in Java, provided by the course and extended by us.
- Language translator, developed from scratch in Python.
Note: This implementation only covers:
- The sentences
IF-THENandIF-THEN-ELSE.- The minimum operator
MIN.- The procedures
PROCEDUREwith parameter passing by value and by reference.- The operators
*,ANDand=(comparison operator, not assignment).⚠️ The rest of the operators are not covered.
⚠️ No optimization is performed on the generated object code (assembly).
⚠️ The original Boreal language and the ENS2001 assembler materials may not be available temporarily. This post focuses on my implementation of the compiler, not on the distribution of the original materials. If you need to consult them, you can try accessing it later or search for archived versions.
Additional Note: All the code in this implementation is written in Spanish, as the course was taught in Spanish. However, this shouldn’t be a problem, as the concepts are explained in English.
2 Language Processor
The language processor is responsible for validating that a source file has no lexical, syntactic or semantic errors.
This module is divided into four phases:
- Lexical analyzer
- Syntactic analyzer
- Semantic analyzer
- Intermediate code generator, which in reality belongs to the translator but is part of the processor’s code.
Before starting, it is important to know the following concepts:
- Symbol table: is responsible for storing identifiers of variables, constants, procedures, etc.
E.g.
| |
- Parse: is responsible for storing the order in which the grammar rules are executed.
E.g.
| |
bottom-up indicates the type of parser used by the syntactic analyzer.
- Tokens: can be anything — a
for, a;, the name of a variable, etc. The source file is split into tokens, which are stored in a separate file with this name.
E.g.
| |
- Finally, the type of parser. In this case, we use a bottom-up parser, but there are also top-down parsers, table-driven top-down parsers, and others.
2.1 Lexical analyzer
For lexical errors, we use a finite automaton that goes through the source file character by character. As it advances, it evaluates the states of the automaton, and if everything goes well, a tokens file is generated as output.
If any symbol does not fit the automaton, it is considered a lexical error.
E.g. of an automaton:
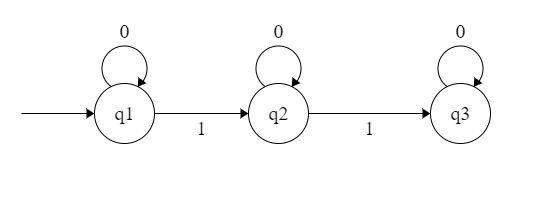
A typical case of a lexical error is an unterminated string. The following image shows an automaton that recognizes strings enclosed in quotes:

Here, C represents any character. To reach the final state and correctly recognize a string, we need to end with a ".
Lexical errors also include situations such as:
- A string that exceeds the maximum allowed length
- A number out of range
- Invalid characters in the language
Among others.
2.2 Syntactic analyzer
For syntactic errors, we analyze the language structure through grammar rules. These errors appear when the sequence of tokens does not follow the expected syntax. This is where the concepts of first and follow come into play. To explain them, we show a fragment of a grammar:
| |
A terminal is a symbol that appears exactly as in the source language (;, if, var…).
A non-terminal represents a rule or construction of the grammar (T, B, P…).
The set first of a non-terminal are all the terminals with which it can start. For example, the
first(W)would be:id,output,input,return,{(Begin).The set follow of a non-terminal is all the terminals that can appear inmediately after it in a derivation. For example, if
Xalways follows;, thenfollow(X) = { ; }.
If a rule can derive lambda (empty string), its follow also includes what could come after that point in the production.
E.g. in P → B P and P → lambda, since P can be empty, follow(B) includes what follows P, even the end-o-input symbol $.
A syntactic error occurs when the current token does not belong to the first set of the expected rule.
For example, if we expect a production of W and the next token is if (which is not in first(W)), it is a syntactic error.
Tipical example: an
elsewithout itsif, or an expression that is not closed.
2.3 Semantic analyzer
For semantic errors, we use semantic actions, which define things such as:
- Attribute inheritance
- Insertions into the symbol table
- Type validations
For example, in a rule like W → output E ;, For example, in a rule like { W.tipo := E.tipo }, which asigns W the type of E.
In the code, this would be reflected by evaluating that case and updating the attribute stack.
A typical semantic error would be when the inherited type does not match the expected one.
2.4 Intermediate code generator
Returning to the translator, the intermediate code generator is an extension of the processor in which we define new semantic actions to generate the file containing the intermediate code, in this case, using the format of a quadruples file as defined by the course.
To do this, in our implementation we define two new classes, gci.java and cuarteto.java (quadruple).
In the first one, we define the following functions:
emite (emit), which is the one that generates the quadruples:
| |
nuevatemp (new temporary), which creates a new temporary variable of the specified type and inserts it into the symbol table:
| |
nuevaetiq (new conditional jump), which creates a new label used for conditional and unconditional jumps:
| |
In the cuarteto class we define the cuarteto (quadruple) object and a toString method for its representation:
| |
Regarding the semantic actions for intermediate code generation, they are defined in the ASem.java class alongside the actions of the semantic analyzer itself.
Below is a code snippet for the action processRule(94, "Z -> id LL");
| |
The semantic actions are divided into two branches:
If there are no parameters (
llAtb.getLongs() == 0):- If
idis a procedure → emitCALL. - If it is a variable → create a tuple with its scope (local or global) and offset in the symbol table, and assign it to
res.setLugar()so that it is inherited by the rest of the tree and accessible in other rules.
- If
If there are parameters:
- Emit the parameters one by one according to their type and whether they are passed by value or reference.
- Emit
CALL_FUN,CALL_FUN_CAD, orCALLdepending on the return type. In this case, onlyCALLis possible since the translator is designed exclusively for procedures (without return value).
resis an object of the attributes class and is the return value of the action method. The actions also receive objects of the attributes class obtained from the semantic analyzer’s attribute stack.
3 Language Translator
Once the source file has been validated, the files tokens.txt, parse.txt, errores.txt, ts.txt, and additionally the file cuartetos.txt are generated. Next, the object code generator, based on the cuartetos file, generates a .ens file.
As we have done previously, before diving into the code we need to understand:
A activation record (AR) is a contiguous memory area where the activation information of a subprogram is stored (each subprogram has its own).

The machine state (MS) is the state before calling a subprogram.
The control pointer (pc) points to the AR of the calling subprogram. It is used at the end of the subprogram.
The access pointer (pa) points to the activation record of the subprogram where the current subprogram is declared. If
bis defined ina, then the pa ofbpoints toa. It is used to access non-local variables when there is function nesting.
3.1 Files Used
In this implementation, we use three files:
_ens.py: handles the creation and writing of the.ensfile._gco.py: main file; translates each cuarteto into.ensinstructions._calcprev.py: calculates sizes of activation records (ARs) and the static data area (globals).
3.2 Functionality
_ens.py: this module contains a single function that opens the .ens file in write mode and adds lines as needed:
| |
_calcprev.py: This script scans the symbol table (ts.txt) to calculate:
- The size of the static data area.
- The sizes of each activation record (AR).
- The references required for pass-by-reference parameters.
We use two helper functions: one to read each line of the symbol table, and another to obtain the size of each type.
| |
Then, in the main() function, we perform a loop that:
Reads the symbol table line by line.
For the local table:
- Calculates the size of the AR by summing the sizes obtained with
reserva(...). - Registers the offsets of the parameters passed by reference.
- Calculates the size of the AR by summing the sizes obtained with
For the global table:
Adds up the sizes of global variables.
Adds the return size if it is a function/procedure.
Finally, it generates the memory initialization directives and the
EQUlabels for each AR.
| |
Note: The variable
cadfinalis not written here because its content is added to the end of the.ensfile.
Finally, we have _gco.py, the main file. Below is a snippet to understand how it works:
| |
We have a section with patterns to detect each possible quartet. For this, we use Python’s re library (regular expressions).
These patterns are also used to extract offsets, names, scopes, and to detect the main program.
| |
Regarding the functions, we use the following:
leer: used to read each quartet.
| |
declarar_cads: allows us to declare string literals at the end of the output file. At the end of the main loop, we call this function with thecadena(string) attribute set toNoneandwriteset toTrue.
| |
leer_cadena_ens: with this function, we can transfer a declared string character by character to a register, or from one register to another. This is essential because, unlike integers, strings must be moved entirely character by character.
| |
paramcad: similar to the previous one, this function is used only when the parameter of a subprogram is a string.
| |
transformar_dir: responsible for moving the memory addresses passed as parameters to the corresponding registers. There can be between one and three parameters. Basically, it receives something like{VAR_GLOBAL, 3}and moves the content at address#3[.IY]to a register such asR2. This is because it is global; if it were local, it would be#3[.IX].
| |
Finally, the main loop is responsible for calling the previous functions and iterating over each received quartet. Since this loop spans about 600 lines, here is the beginning to clearly show its operation.
| |
As can be seen, this is a very straightforward loop where we evaluate each case and generate the corresponding object code.
4 Usage
This section details the steps necessary to install dependencies, compile the project, and run each component.
4.1 Installing Dependencies
To install the processor library (ts-lib.jar) into your local Maven repository, run the following command:
| |
Or if you are on Linux or macOS:
| |
4.2 Compiling the Processor
Once the library is installed, build the processor executable with:
| |
4.3 Running the Processor
After compiling, you can run the processor with the following command (replace the path with that of your Boreal file):
| |
4.4 Running the Translator
From the gco/ folder, where the translator executable is located, run:
| |
Or if you are on Linux or macOS:
| |
This will generate all the processor files as well as the cuartetos.txt (intermediate code) and codobj.ens (object code) files.
4.5 Object code execution
To run the .ens file, you need to download the assembler (available in the Tools section), compile it, and execute it with the generated codobj.ens file.
5 Execution
This section explains how to run the code generated by the translator, and tests different examples to understand its behavior.
Note: Only the Windows explanation is covered here, since on Linux the assembler lacks an interface and is less illustrative.
5.1 Prerequisites
- Ensure you have compiled the project (see Usage section).
- Generated
codobj.ensfile (object code).
5.2 Download
To do this, we need to download the assembler (available in the Tools section). After extracting the archive, we get a folder named ENS2001-Windows like the following:
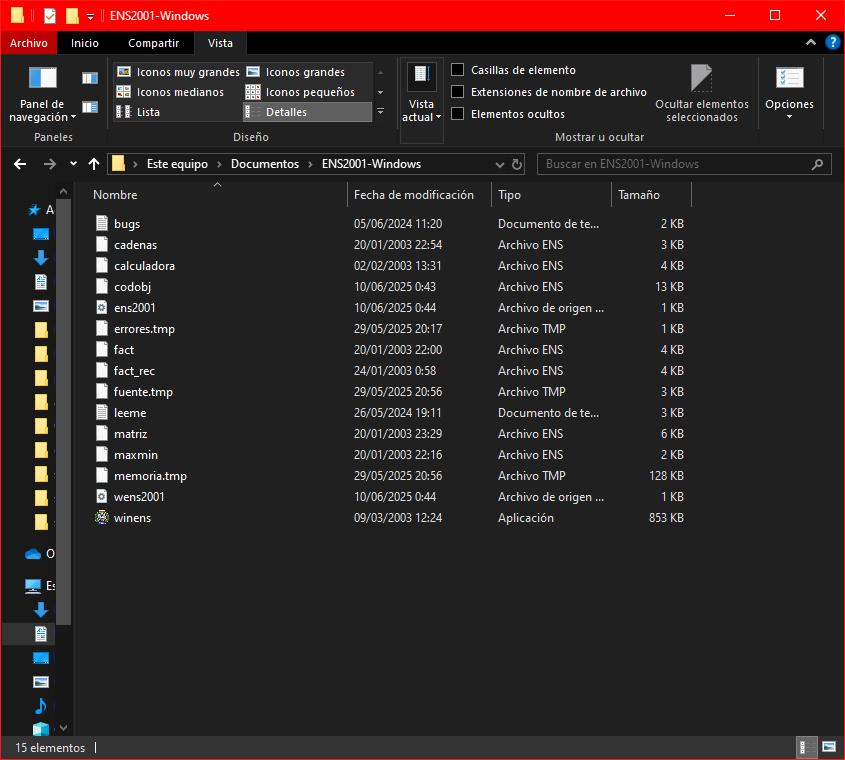
Except for the codobj.ens file, which is the one we will assemble, the rest of the files come by default. Some examples and two files that are recommended to read are included: readme.txt and bugs.txt.
5.3 Assembler
The assembler is the executable shown selected in the screenshot above (winens).
Once launched, you will see an interface like the following:

To clearly see what the assembler is doing, it is recommended to open the following windows:
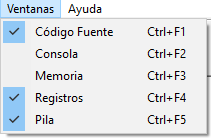
The código fuente (source code) window shows the order in which the object code instructions are executed. In this case, since no file has been loaded yet, all addresses are at
NOP.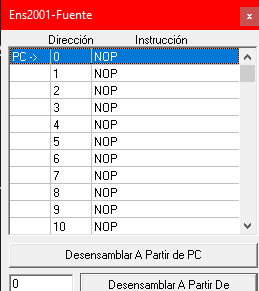
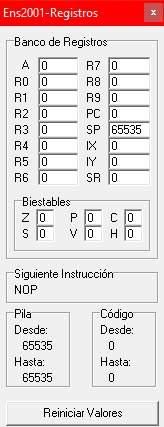
The registros (registers) window shows the state of the machine registers.
The pila (stack) window shows the contents of the data stack.

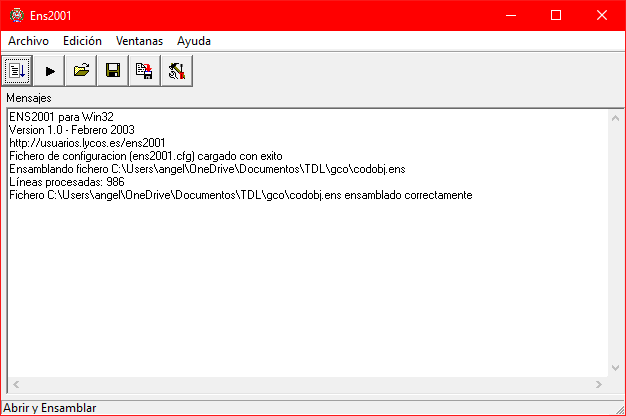
To load the codobj.ens file, go to Archivo > Abrir y Ensamblar. If everything goes well, it will tell you the assembly was successful:
Now we are ready to run the assembler. Pressing ▶️ will execute the assembler and show the result. If our code calls console output functions, the console will open. In this case, we assembled the file expr.txt (available in the GitHub repository), and the result is as follows:

We enter a digit as requested and press enter.
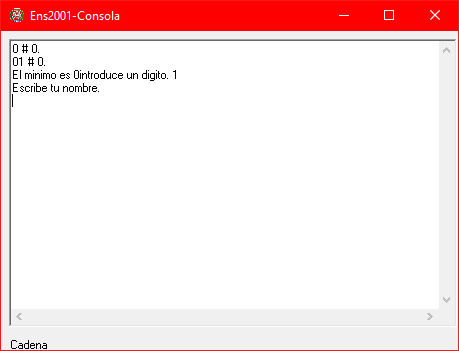
We type our name:
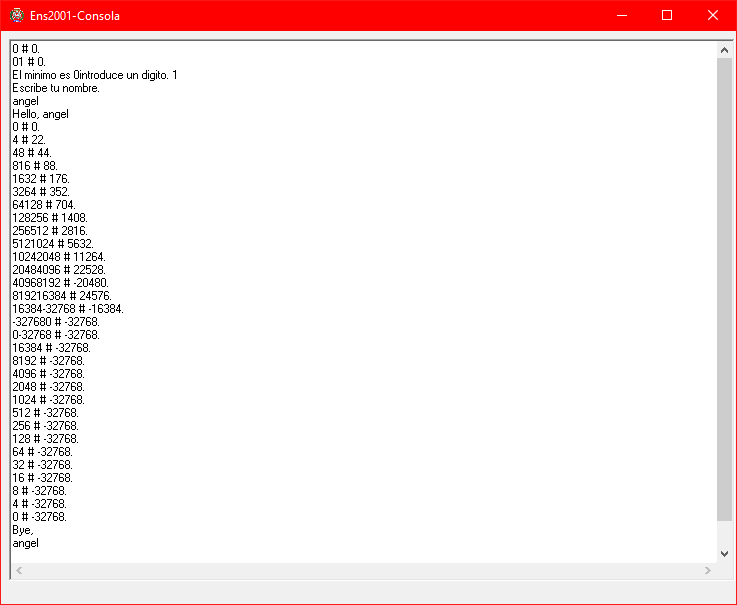
After this, the program finishes its execution successfully.
6 Tools
Both the language processor and the symbolic assemblers used to assemble the object code (ENS2001) are available at the following link:
You can find the source code for this implementation in my GitHub repository:
7 Conclusion
This project is a great opportunity to learn and dive deeper into how a compiler works. Even though it’s based on a language and an assembler that are not used in development, it serves as a simple and didactic example to explain key concepts.
Again, you can find the source code in my GitHub repository.
Have a nice life! 👋